Thursday 10 November 2011

Project 5 stage 3 & 4


Project 5 Stage 3 & 4


Stage 3


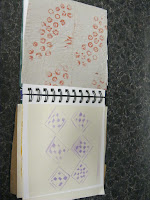
By this point I had decided what the design would look like, but I was still unsure of the colour combination that I was going to use or what type of repeat pattern I was going to do with the lino block that I had designed, so I tried a couple of different designs. I first tried layers of complimentary colours, reds and orange and blues and greens and them red, brown and blues. I felt that the red, brown and blue worked better for this sample as, apart from the blue it was the colours that were in my objects that I had drawn. Then I did two different repeat design that i thought worked well with my block print. The first a random, overlaying repeat and then a diamond pattern repeat. They both work well but again for this sample I like the overlaying of the print, as it made interesting patterns when it was overlaid and gave the fabric depth and movement.
Here is my approx 40cm x40cm samples:
Stage 4


Here is my final design. It has 3 different layers of colours rolled on in blocks in different directions horizontally and vertically, I then printed the lino block in two different colours over layering where I felt it worked, I added an extra layer to the design of shading on selected part of the print in Markel paint stick to add to the depth and movement. I am really pleased with it, and feel that I have achieved movement and depth. I love the colours that I chose and feel that they work well together, but I think that any colour combination that works together will work and would give the piece a different feel and mood. I am happy with my chose of fabric, calico. I feel that the weight and texture work well with my design and that a shiny, lightweight or textured fabric would have detracted from the design or it would have lost the texture that I was looking for from the rolled background. I feel that the design works well as the shapes and repeat of the design is simple, which allowed me to overlay the image and colour without it looking to messy.


Reflection from Assignment 2


I really enjoyed this assignment. I felt a little bogged down at the beginning as sewing and embroidery is not my strong point and I do not enjoy it as much as other parts of textiles, but I do think I will use it in some parts of my design work in future. I enjoyed all the drawing, and could have spent hours doing that as well as the printing, I had forgotten how much I enjoyed to do this and would like to do more in the future. I feel that my final print was very successful and that I manage to work thought the design process with ease. My only limitation was finding the time to do it. I did not do much painting on fabric and I did not do the machine embroidery on water soluble fabrics because I ran out of time, but I hope to get round to trying this out. I am looking forward to the next assignment even thought there is more sewing!!

Project 5

Project 5 Painting and printing
Stage 1 & 2
I spent an hour looking though all my fabric and deciding which were best fitted to my designs that I was planning on doing. Most of the fabrics were plain, tones of cream, grey and green. I also chose black and red. I chose all sorts of fabric types from muslin, hessian, calico and cottons to see what happened when they were printed on.

I then chose 4 designs that I felt worked and then looked at them to come up with a design that worked well on fabric.  I first chose the fern design and felt that a subtle print would work well for this design. I have two different designs for this, a block print and a stencil. I also like the geometric design with the line, circles and diamonds. I was looking through an African textile book that I got out of the library and this gave me a few ideas that I could use for the colours and design of this design. I loved the shades of browns and blues, and the respective block prints.


This lead me to design a block print out of lino using the shapes, here are some of the practicing:


I feel that some fabrics worked better than other, hessian was difficult to print on and muslin gave a grainy effect, the shiny fabric worked well, apart from it is on black so it is hard to see the design. The green on green fern design was far too subtle and I felt that I needed to take more time on this design to make it work. I felt that the geometric design was started to work how I wanted it to but it was still missing something, so I looked through Ruth Issett’s book again and realised that it was layers in colour that I was missing and went back and looked at my practice paper and fabric and design work and came up with a new idea using the lino blocks and roller and bits that I felt work from all of these.

Hand Painting on fabric


Hand Painting on fabric.

I did a very small amount of painting on fabrics, as I felt that I needed to move on. I had a quick go on fabric with different medias to see what effect I would get. I used fabric paint, fabric crayons and Markal paint sticks. If I have time I would like to paint with the Markal paint sticks on fabric, as I found that they gave a lovely smooth effect.


Experimenting with printing and painting.

Stage 1 Preparation

I started by making my printing pad and table. I was lucky that my husband managed to pick me up a games table cheap at an auction and I found that it was perfect for my printing table. It is easy to store away as the legs fold under.


Stage 2 Experimenting with techniques

I then experimented with making some block, relief printing pad, and stencils. While putting these together I kept my ideas for my printing in my mind.


Using the blocks and stencils I experimented with the fabric paint on paper. I also use my printing roller to put colour on the paper and add texture. Here are a few of my first experiments


My first designs were very experimental and  I was just trying to get a feel for the techniques. I then spent an evening developing my ideas and techniques using acrylic paints. I did this so I would not run out of fabric paint. As you can see they were much more successful and I feel that they gave the feeling of movement and depth to the prints. Here are a few:

Experimenting with printing and painting


Experimenting with printing and painting.

Stage 1 Preparation

I started by making my printing pad and table. I was lucky that my husband managed to pick me up a games table cheap at an auction and found that it was perfect for my printing table. It is easy to store away as the legs fold under.


Stage 2 Experimenting with techniques

I then experimented with making some block, relief printing pad, and stencils. While putting these together I kept my ideas for my printing in my mind.


Using the blocks and stencils I experimented with the fabric paint on paper. I also use my printing roller to put colour on the paper and add texture. Here are a few of my first experiments


My first designs were very experimental and were just trying to get a feel for the techniques. I then spent an evening developing my ideas and techniques using acrylic paints, so not to run out of fabric paint. As you can see they were much more successful and work well in moving the paper and I feel I was starting to develop depth to the prints.


Stage 4 Developing design ideas


Stage 4 Developing design ideas

I started off by photocopying the 4 different photographs that I felt I could develop and changing the scale and size. I then played with each image trying different colours, looking and the different textures and shapes. I looked at the shapes in between images, which was interesting and could develop into good designs.  I feel that some designs are more successful than others.  Here are a few of my more sucessful pages.


Review of work done so far in project 4.

Did you manage to ‘make space move’?
Yes I feel that I did move space. Some were more successful than others such as the fern on stone design, it had more movement than the weave basket and dried flower.
What are your thoughts about the drawings you did in stage 3?
I enjoyed doing the drawing at stage 3. I found myself thinking about how they would make a design. While doing the dried flower and weave drawing I kept thinking about the Japanese print, I think it is the colour. Also while trying different colours with my fern design, I felt I understood Andy warhol a little better and maybe understood why he chose the colours he did.I feel he was trying to create a mood, change the way the object he was printing was seen.
Were you able to use the drawings successfully as a basis for further work? Are there any other things you would like to try?
I was able to use the drawings for other work; some were more successful than others. I could have spent hours just playing with ideas, there were lots of ideas I had in my head while doing these designs, just did not have the time to do them all. I am looking forward to taking it forward to printing stage.
Now that you have a good working method, do you feel confident that you can carry on working in this way independently?
I do feel confident that I can carry on working in this way. I feel very comfortable doing it. While at college years ago I was trained to work like this, although I am a little rusty it is all coming back slowly.